
Since the cost of electricity is steeply increasing and concern for the environment continues, solar energy is coming to the rescue of many homeowners and small businesses for its unquestionable reliability and eco-friendliness. A 3kW solar panel system has been the most sought-after option because it blends perfectly between the price, area requirements, and power generation capacity. This system is most suited for small households or offices, where it meets basic electricity needs while contributing immensely to lowering power bills.
But what are the steps to install a 3kW solar rooftop? What are the components required, and what are the various steps that ultimately lead to the right kind of setting for maximum efficiency? Knowing the process will save you time and money and ensure that your solar system runs effectively for many years.
In this blog, we will walk you through the step-by-step installation process of 3kW solar panel systems. We will assess energy requirements and choose the right equipment, installation, pricing, and maintenance tips for you. In addition to this, we will itemize pricing associated with a 3kW solar rooftop, allowing you to plan your budget accordingly, the cost of a 3kW solar panel system.
This guide shall serve as a companion for making installation easier while providing you with the knowledge necessary for making well-informed decisions for the homeowner looking to reduce energy costs.
Let us commence our journey into solar energy and the responsibilities therein!
Step 1: Assess Your Energy Needs
The first and foremost in setting up a 3kW solar panel installation is to analyse the energy requirements of the household or office thoroughly. This makes sure that whatever system is selected is compatible with the electricity being consumed.
1. Electricity Bill Analysis
Collect electricity bills for the last 6-12 months. They contain most of what is needed to assess average monthly energy consumption in kWh. This way, one can make allowances for seasonal variations such as air conditioning in the summer or heating in winter.
2. Average Monthly Energy Consumption Calculation
When you have the electricity bills, you can substitute them into the formula to find out your average monthly energy consumption:
Average Monthly Consumption (kWh) = (Sum of monthly kWh readings) º Number of months
Over the 12 months, your total energy consumption is 3,600 kWh:
For example- Average Monthly Consumption = 3,600 ÷ 12 = 300 kWh
3. Future Considerations
- As you compute your present consumption, it is important to address future energy consumption needs as well; some questions you should reasonably consider are:
- Any new appliances being acquired, e.g., air conditioning, electric cars, and home automation? Changes in your residential environment can lead to increased energy use.
- Can there be energy efficiency improvements, such as through LED lighting or energy-efficient appliances, that may create a reduction in load?
- This way, you account for them in terms of future use to keep the solar installation effective over time.
4. Estimating the Energy Output a 3kW Solar System Produces
Typical 3kW solar panel installations give around 12-15 units a day (kWh). The precise output is dependent on sunlight hours: those regions have more direct sunbeams; panel efficacy: high-efficiency panels generate more power; shading: nearby buildings, trees, or some other obstacle may obstruct; Orientation and tilt: Properly orient the solar panels to maximize exposure to the sun.
An ideal situation for the 3kW system might produce between 360 and 450 kWh per month. Measure that with your average monthly consumption to determine if this system size would be necessary for you.
Step 2: Site Evaluation and Feasibility Check
Before the installation of the solar panels, it is most important to have a thorough site evaluation to ensure that the roof is ideal for a solar energy system. The roof must also be assessed based on evaluating the following factors to determine whether it is possible to accommodate the solar panels and whether or not it would work effectively:
a) Roof Space –
Roof space comes as a critical factor before deciding on whether installing solar panels on a roof is practical. The area free from shade required for a solar power system of 3 kW is around 300-400 square feet. The area requirement usually depends on the efficiency of the solar panel, its size, and the angle at which it will be installed on the roof. Larger systems like 5kW or 10kW will require more area.
Consider the following points:
- Panel Size: The size of each solar panel is about 65 inches by 39 inches (approximately 17.5 sq. ft.), hence, the ultimate number of panels will depend upon your required power output requirement.
- Roof Area Available: Consider the area on the roof to accommodate the number of required matching panels, accounting for obstructions on the roof, including chimneys, HVAC units, and skylights that might limit usable area.
b) Orientation-
Orientation has everything to do with it; it determines how sunlight will hit the panels throughout the day. For solar panels in the Northern Hemisphere, the ideal orientation is south-facing. This means that, during the day, the direction in which the panels face will gain the most sunlight.
Things to consider:
- South-Facing Roofs: A south-facing roof will typically receive maximum sunlight across most of the year if located towards the Northern Hemisphere. Such a design will therefore provide the optimum energy generation.
- East-West Orientation: The same holds concerning east or west-facing roofs. East-west-facing systems will generally produce less energy compared to south-facing roofs, as they will not receive direct sunlight for as long during the day.
- Roof Tilt and Angle: Regardless of whether the roof slopes perfectly, adjustment structures will have to be mounted for the panels to gain that incline. Tilt is between 30° and 40° for solar panels, usually in the Northern Hemisphere.
c) Shade Analysis-
Solar panels lose all efficiency with the slightest touch of shadow. They can even be shaded partially early for one panel, and that can affect the entire power generation capacity of the system. Thus, the site assessment needs to look very closely into the roof check to ensure that there are no shadow-casting objects, e.g. trees, nearby buildings, or other structures.
Considerations:
Seasonal Changes: Seven months have passed now, as we need to look at different times of the year because the shadows will fall differently according to the sun’s position.
- The analysis shows that a shadow-free rooftop for summer may not be shadow-free in winter and can cause varied performance with the panel.
- Nearby Trees and Buildings: Trees with hanging branches can block sunlight; buildings limit shadow distance.
Step 3: Selecting Solar Components
To reduce electricity bills and go green, a 3kW solar panel system would be the best-suited installation for homes or small businesses. This kind of system can generate about 12–15 units of electricity daily, depending on sunlight conditions. Now, let us analyze all the essential components and elaborate on their functions.
1. Solar panels Photovoltaic modules
- Function: The solar panelled roof is the visage of this place and acts by collecting sunlight and converting it into an electric current with the help of the photovoltaic effect.
- Panels required: A standard string of about 8-10 panels would be needed to put together a 3kW system, depending on their wattage and efficacy.
- Wattage of solar panels: Most normal panels have an average range of between 350W to 400W per panel.
Types of Solar Panels:
- Monocrystalline: expensive, very efficient, so it consumes less space.
- Polycrystalline: cheaper, not so efficient.
- Bifacial: sunlight is captured on both sides, helping further improve efficiency.
Be sure to purchase certified panels, IEC or BIS, to ensure quality and durability.
2. Solar Inverter
Function: Since solar panels generate electricity in direct current, an inverter is required to change it into alternating current, the current form of electricity used by most household appliances.
Types of Inverters:
- String inverters connect multiple panels in series. They are the most inexpensive option and suitable for small rooftops that do not get any shading.
- Microinverters are attached to each panel, allowing for optimization at the panel level. For example, if there are partial blockers, such as shading.
- Hybrid inverter: Combines a solar inverter with a battery inverter; therefore, suitable for any energy storage system.
- Sizing: The capacity of the inverter should match and slightly exceed the solar array size. Thus, for a 3kW system, the inverter should be of the size of 3kW or 3.5kW to take care of peak generation.
3. Mounting Structure
Function: The mounting structure ensures the positioning of the panels in such a way that they receive optimal sun rays.
Key considerations:
- Tilt Angle: The tilt angle is usually between 25° to 35° in the Northern Hemisphere, as that maximizes exposure to the sun.
- Material: Galvanized steel or aluminium is preferred so it does not rust easily and withstands the onslaught of harsh weather.
- Roof compatibility: The structure must be compatible with the type of your roof, flat slope or metal, for stability.
- Wind resistance: The structure should meet the local wind load criteria, which are typically designed to withstand speeds of 150 km/h or more.
4. Battery (Optional)
Compressed into words is an outline of a functional solar system that stores excess energy from solar panels in batteries for night use or power outages. Batteries are optional in on-grid type systems, but are very crucial in off-grid or hybrid systems.
Types of Batteries:
- Lead Acid- Low cost, short-lived batteries, and high maintenance required.
- Lithium-Ion- Expensive batteries, more efficient, fast charge batteries, long-lasting.
- Battery Capacity: A 5kWh to 7kWh battery would give a few hours of backup through the night for a normal 3kW solar installation.
5. Wiring and Connectors
Function: Wiring and connectors link solar panels to inverters, batteries (when required), and electrical panels to facilitate energy flow.
Key Components:
- DC Cables: Connect solar panels to the inverter.
- AC Cables: Distribute power from the inverter to the home main board.
- Connectors: Secure weather-resistant connections utilizing MC4 connectors, the industry standard for solar panel wiring.
- Earthing Wires: Perform the grounding of any fault currents to protect the system from electrical damage.
- Safety Notes: Wiring should conform to national electrical standards and be UV-resistant for durability against sunlight.
6. Monitoring System (Optional But Recommended)
Function: Solar monitoring system keeps track of real-time data of electricity generation, consumption, and battery status.
Types Available:
- On-Site Displays: Show energy metrics directly on the inverter.
- App-Based Monitoring: Most modern inverters now link to mobile apps that allow remote tracking of system performance. They can help to discover issues quickly and thereby allow your panels to work at maximum efficiency.
This is the step to choosing the right products and brands to help extend the life and efficiency of your system:
- Get reputable brand panels and inverters—Canadian Solar, Trina Solar, LG, Enphase, and SMA.
- Ensure these products are certified by IEC, MNRE (Ministry of New and Renewable Energy), or BIS.
- Warranties—25-year performance warranty for panels; 5-10 years for inverters.
Step 4: Cost Estimation & Subsidy for the 3kW Solar Panel System in Assam
The installation of a 3kW solar panel system has great commercial implications regarding savings in electricity cost and the position of renewable energy. Thus, one must get acquainted with the costs and the subsidies to formulate their plans for such an investment. Let us discuss each thing involved in detail.
1. Cost Split-up:
The typical cost of a 3kW solar panel system in Assam is about ₹1.5 lakh to ₹2 lakh without subsidies. Actual costs are subject to various influencing factors:
a) Solar panels
- Monocrystalline Panels: Efficiency for these types of panels is very high (18-22%), and they can produce pretty good power even in lower light framing conditions. They need less area on the roof but are a bit expensive at ₹35~₹45 per watt.
- Polycrystalline Panels: Cheaper and the same considerations go with them; they are less efficient (15-17%) at the same costs, i.e., ₹25 to ₹35 per watt.
Considering a 3 kW system:
- Monocrystalline panels: ₹1.05 lakh – ₹1.35 lakh
- Polycrystalline panels: ₹75,000 – ₹1.05 lakh
b) Inverter
Inverters convert electricity generated from panels from direct current (DC) to alternating current (AC) for household use.
- String Inverters: Cost ranges from ₹20,000 – ₹40,000 for a 3kW capacity.
- Microinverters: More expensive, less cost-effective, thus becoming ₹50,000 − ₹80,000 for the whole system.
- Hybrid Inverters: If you are planning to back the system with battery storage, the cost is approximately ₹60,000 – ₹1 lakh.
c) Mounting structures
These are mounting structures that support the solar panels mounted atop the roof. Prices vary from ₹10,000 to ₹20,000 depending on the type of structure (galvanized steel or aluminium) and type of roof (flat or sloped).
d) Batteries: Optional
Batteries are required for storing excess energy in off-grid or hybrid systems.
- Lead-acid batteries: ₹30,000 – ₹50,000
- Lithium-ion battery: ₹70,000 – ₹1.2 lakh (longer life and fast charging)
e) Wiring and accessories
This component consists of good-quality low-tension DC wires, AC cables, connectors, and switches, which may cost around ₹15,000-₹25,000.
f) Installation and labour
The charges for professional installation, labour, and transportation vary between ₹15,000-30,000, and any electrical work and safety check will also be included in this.
Government Subsidies
- Government subsidies for solar rooftop systems have been made available by the centre and the state governments for promotion.
- Residential solar rooftop systems under the Rooftop Solar Programme, Phase II, attract a subsidy from the government.
Systems <=3 kW: 40% subsidy on benchmark cost.
Systems >3 kW and <=10 kW: 20% subsidy on benchmark cost.
Systems above 10 kW have no subsidy.
A subsidy of ₹72,000 would therefore apply to a system of 3 kW costing ₹1.8 lakhs:
40% subsidy = ₹72,000
Final Price after subsidy = ₹1.8 lakh – ₹72,000 = ₹1.08 lakh
How to apply for the subsidy:
- Register on the National Portal for Rooftop Solar or the solar portal of your state. Submit all the required documents (proof of residence, electricity bills, system specifications).
- Once approved, you may select a registered vendor for installation of the system, with subsequent transfer of the subsidy amount to your bank account after installation and inspection.
Step 5: Installation Process of a 3kW Solar Rooftop System
Now, it’s time for you to follow the step-by-step installation process of a 3kW solar rooftop system. If all the necessary components have been acquired in a budget-friendly manner, the next thing to do is install them. Installations determine the safety, efficiency, and longevity of the solar power system you install. Below are the step-by-step processes involved in the installation.
1. Site Preparation and Safety Arrangement:
Preparation of the roof before commencing with the installation will include the following steps:
- Clear the area of any debris and dust obstacles.
- Mark out the layout of the panel placement according to the shading analysis.
- Safety precautions such as harnessing and insulated tools will be adhered to by workers.
2. The Mounting Structure
Mounting grounds the solar panel. Its secure anchorage must withstand the force of wind, rain, and all the other variables of the surrounding environment.
Type of Roof Consideration:
- Flat Roof: This requires a raised mounting structure that tilts panels to an optimal angle.
- Sloping Roof: Panels are fixed parallel to the roof surface with little dependence on additional support.
- Orientation and Tilt Angle:
- In India (Northern Hemisphere), facing south is the best direction for maximum exposure to the sun.
- The preferred tilt angle will range from 20 to 30 degrees, depending on the site.
Installation Steps:
- Drilling holes and fixing the structure using anchor bolts or chemical fasteners.
- Ensuring the structure aligns and is firmly secured.
- Applying anti-corrosive coating if necessary for durability.
3. Installing Solar Panels
- Solar panels are installed when the mounting structure is already in place.
- Carefully place the panels onto the mounting structure.
- Fix it into place with clamps and brackets to prevent movement.
- Leave sufficient space for ventilation and dissipation of heat between the panels.
4. Electrical wiring
This wiring phase is to connect the solar panels directly to their inverter and battery (if any).
- DC Wiring: Connects the panels in either series or parallel connection to achieve the desired voltages and current levels.
- AC Wiring: Carries the power provided by the inverter towards the distribution board (DB).
Earthing and Lightning protection:
- An appropriate earthing system ensures safety by preventing the handling of electrical shocks and is regarded as safe.
- Power distribution protection devices (SPD) with lightning arrestors protect the system from power surges.
- Cables should be UV-resistant and waterproof to enhance longevity.
5. Inverter Installation
- A solar inverter is an important component that turns direct current (from panels) into alternating current (for home appliances).
- Shade its well-ventilated areas to prevent it from heating any longer.
- It must be connected closely to the main distribution board for easy access during connectivity.
- Proper earthing and surge protection should be observed.
- If it is a hybrid or off-grid system, connect the inverter to the battery bank.
6. Grid Connection (For On-Grid Systems)
On-grid solar systems could feed their excess electricity to the utility grid through net metering.
- Apply for a net metering connection with the area electricity board.
- Install a bi-directional meter to measure both consumption and generation of power.
- Connect the inverter output to the local mains with a circuit breaker.
7. Testing and Commissioning
Testing before operation:
- Use a multimeter to check the output voltage and current from all panels.
- Test the inverter efficiency and power conversion ratio.
- Check the charging discharge for batteries (if needed).
- Test synchronizing the grid with the on-grid systems.
- Make sure all connections are tight and follow safety protocols.
8. System Monitoring and Maintenance
After commissioning, to enhance the performance, the system requires regular monitoring:
- Smart Monitoring Apps: Modern inverters are equipped with Wi-Fi or Bluetooth connectivity, allowing you to monitor real-time data as it is generated.
- Cleaning Panels: Dust and dirt make them less efficient and should be cleaned every 1-2 months.
- Annual Maintenance Checks: Electrical wiring inspection, mounting structures, and inverter checks.
Step 6: Maintenance and Monitoring of a 3kW Solar Rooftop System
Regular maintenance of your 3kW solar rooftop system is important in putting it into service because it helps to ensure an effective long-term performance of this system. A properly maintained solar energy system would have its energy-producing ability maximally utilized and might even function undiminished for 25 years or more. Below, find a complete guide on the maintenance as well as monitoring of your solar system.
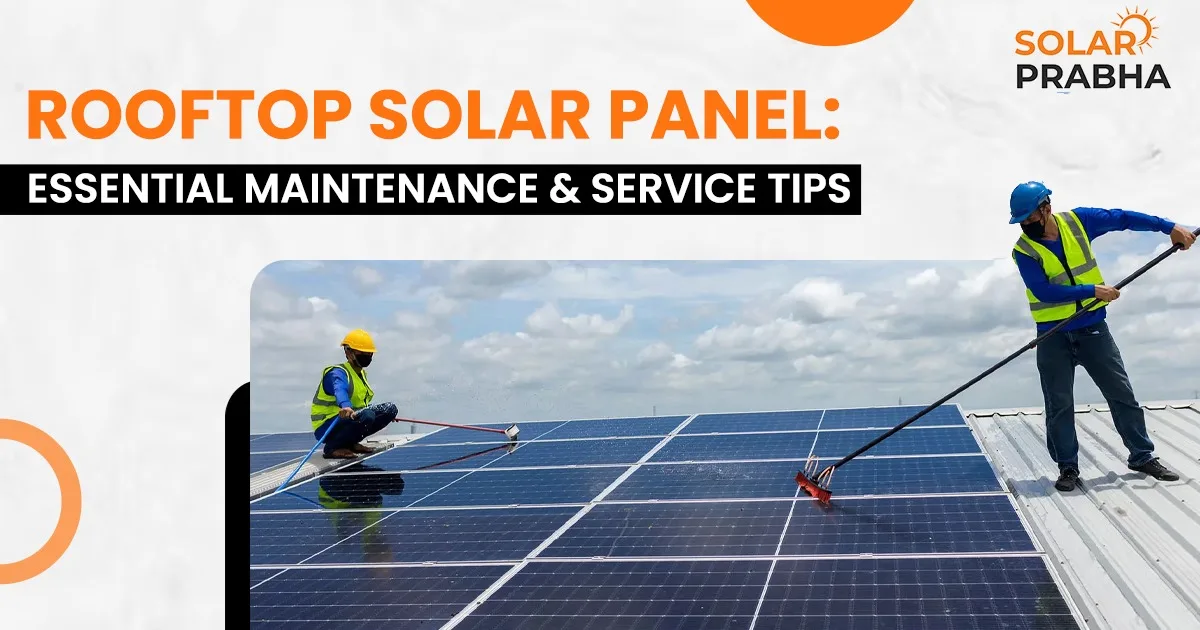
1. Solar Panel Cleaning
Over time, dust, dirt, bird droppings, and other debris accumulate on solar panels, causing efficiency losses of 10 to 25 per cent if solar panel cleaning is not done regularly.
When to Clean?
Areas with high dust or pollutant particles are cleaned once every month to two months.
In less dirty environments but with normal rains, every three to six months can suffice for cleaning.
How to clean Panels?
- Use a soft microfiber cloth or a sponge with water to wipe its surface.
- Do not use harsh chemicals, detergents, or abrasive materials that would damage its protective glass layer.
- In-situ roofs where the panels are difficult to access should be done with a long-handled brush or a hose with deionized water.
- Perform cleaning in the morning or evening hours to avoid thermal stress on the glass.
2. Checking and Maintaining Electrical Wiring
Faulty or loose wiring leads to loss of power, safety hazards, or even system failure. Periodic checking ensures that all electrical installations are in good condition.
Key Electrical Maintenance Checks:
- Test junction boxes, inverter terminals, and connectors for loose connections.
- Look for oxidation or rust in metal terminals, especially in humid places.
- Watch for cuts, frays, or rodent damage to cables.
- The earthing system should be intact to prevent shock hazards from lightning strikes.
How Often to Inspect?
- Conduct visual inspections every three to six months.
- Once a year, schedule a professional electrical check-up for conformance to safety standards.
3. Monitoring System Performance
Modern solar inverters come with mobile apps as well as web-based monitoring tools that help keep track of real-time energy production. Monitoring also allows tracking performance drops that can be attributed to shading or wiring problems and those caused by faulty components.
Key Performance Indices to Monitor:
- Daily kilowatt hours of energy produced should counter the expected output based on the sunlight hours.
- Inverter efficiency shall be above 95% levels for best performance.
- Battery health in an off-grid or hybrid system should be tracked to check the charging and discharging cycles.
- Grid export would be monitored in on-grid systems through net metering, which tracks the energy sent back to the grid.
How to Monitor?
- The inverter, display, or mobile app could be used for real-time tracking.
- Check your electricity bills for net metering credits.
- Since most individuals tend to have those generators in a month, comparing current performance with previous months would help show if there are any dip inefficiencies.
Conclusion
For any homeowner looking to go green with energy and save some bucks on their electricity bills, a 3kW solar panel system is a great investment. With this step-by-step guide, you should be able to confidently undertake the transition to solar power: evaluate energy needs, determine site feasibility, select good-quality components, estimate costs, and have the system installed by an experienced professional.
Key Benefits of a 3kW Solar Panel System
- Large Savings: Well-maintained solar systems can decrease your electricity bill tremendously during their lifetime of more than 25 years.
- Environmental Contribution: The very act of oneself also brings in a reduction in carbon emissions and less dependence on foreign fossil fuels.
- Energy Security: Produce your energy and insulate yourself against price hikes, augmented by outages in the grid.
- Government Incentives: In many places, subsidies can make the cost of a residential setup 40% less than before, thus making the transition even easier.
- So, a 3kW solar paenl system justly counts as an insignificant cost for energy security, sustainability, and financial gains over the long term. This step in solar energy may be for your home or solar-powered water pumping.
Act Now
Get on board with clean, renewable energy, leaving antiquated water-pumping technology, and Solar Prabha will ensure that all your needs are met.
Call Solar Prabha in Guwahati now at +91-7099030047 and discuss the options available for you. Get an expert consultation on installation and financing, and take the first step towards the solar future.
Let the sun share the burden of your home and water pumping needs—make a start on your sustainability journey today!